How to Use Chef’s Choice Knife Sharpener: Easy Steps Guide
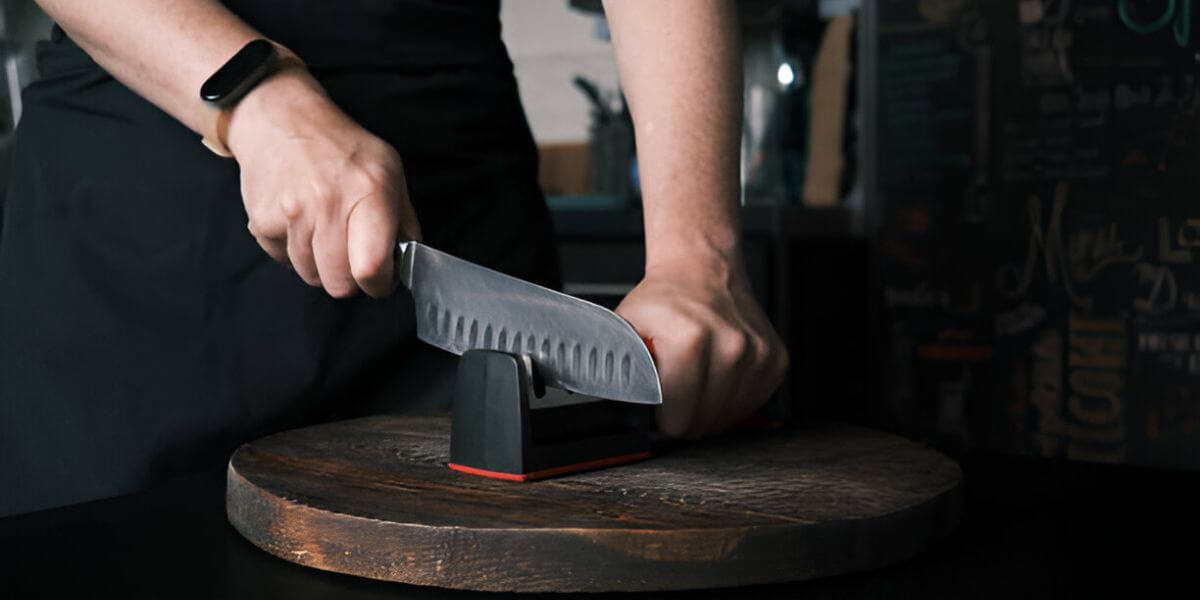
To use the Chef’s Choice Knife Sharpener, place the knife in the slot and pull it through evenly. Repeat this process as needed.
The Chef’s Choice Knife Sharpener is a popular and effective tool for maintaining sharp kitchen knives. Adequately sharpened knives enhance your cooking experience and ensure safety. This sharpener uses precise angles and advanced technology to deliver professional-level sharpness quickly. It accommodates various blade types, making it versatile for different kitchen knives.
Regular use keeps knives in optimal condition, reducing the need for frequent substitution. Easy to use, even for beginners, ensures consistent results every time. Investing in a quality knife sharpener like Chef’s Choice makes a noticeable difference in kitchen efficiency and food preparation.
Getting Started On Chef’s Choice Knife Sharpener
Using a Chef’s Choice Knife Sharpener can revolutionize your kitchen experience. A sharp knife means safer and more efficient cutting. It’s comfortable and user-friendly.
This guide will show you how to choose the suitable model and essential safety tips, ensuring you feel at ease.
Choosing The Right Model
The first step is choosing a suitable model. Chef’s Choice offers various models to suit different needs. Here are some factors to consider:
- Blade Type: Different models are designed for different blade types. Some models are ideal for straight blades, while others cater to serrated blades.
- Usage: If you sharpen knives frequently, consider an electric knife sharpener. It’s faster and easier to use.
- Price: Chef’s Choice offers models at different price points. Higher-end models often have more features and better durability.
Here is a quick comparison table to help you decide:
Model | Blade Type | Features |
|---|---|---|
Model 15XV | Straight and Serrated | 3-stage sharpening, Diamond abrasives |
Model 1520 | All types | Angle Select system, 3-stage sharpening |
Model 130 | Straight | 3-stage sharpening, Stropping disks |
Safety Tips
Using a Chef’s Choice sharpener safely is crucial. Follow these essential safety tips to ensure you sharpen your knives without any accidents:
- Read the Manual: Each model comes with a manual. Please read it thoroughly before you start using the sharpener.
- Stabilize the Sharpener: Place the sharpener on a stable, flat surface. This prevents it from moving during use.
- Handle Knives Carefully: Always hold the knife by the handle. Keep your fingers away from the blade.
- Unplug After Use: Always unplug an electric knife sharpener after use to prevent accidental starts.
- Wear Safety Gear: Consider wearing cut-resistant gloves. This adds an extra layer of protection.
Setting Up The Sharpener
Setting up the Knife Sharpener is crucial for achieving the perfect blade edge. This guide will help you understand how to correctly place and stabilize your sharpener and ensure it meets power source requirements. These steps will ensure your electric knife sharpener operates smoothly and efficiently.
Placement And Stability
Proper placement and stability are crucial for effectively using the Chef’s Knife Sharpener. Follow these steps to set it up correctly:
- Choose a flat surface: Place the sharpener on a flat, stable surface. This prevents any wobbling or tipping during use.
- Ensure adequate space: Ensure enough space around the sharpener for easy maneuvering your knives.
- Non-slip base: Most electric knife sharpeners come with a non-slip base. Ensure this feature is intact and functional to avoid any movement during sharpening.
Power Source Requirements
Understanding the power source requirements of your knife sharpener is essential for its proper functioning. Here’s what you need to know:
- Check the voltage: Ensure your power outlet matches the sharpener’s voltage requirements. This information is usually found in the manual or on the device itself.
- Use a grounded outlet: For safety, plug the sharpener into a grounded outlet. This minimizes the risk of electric shock.
- Avoid extension cords: Plugging directly into a wall outlet ensures a stable power supply, but using extension cords can cause power fluctuations.
Types of chef’s choice knife
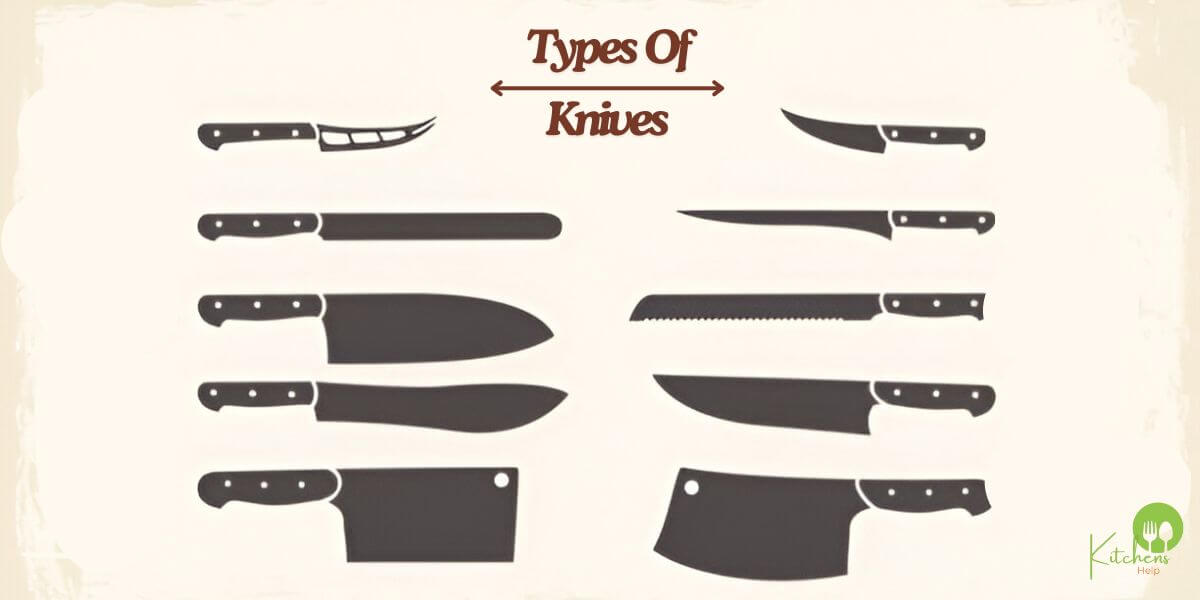
Using a Chef’s Choice Knife Sharpener can make your kitchen prep more efficient. Knowing the types of knives you are sharpening is crucial. Different knives serve different purposes, and each requires specific care. Here, we will explore two common types: Chef’s and Paring Knife.
Chef’s Knife
The Chef’s Knife is the most versatile tool in your kitchen. It’s perfect for chopping, slicing, and dicing various ingredients. Properly sharpening this Knife ensures smooth and precise cuts.
When using the Sharpener for your Knife, follow these steps:
- Stage 1: Use coarse diamond abrasives to create the initial edge.
- Stage 2: Use fine diamond abrasives for honing.
- Stage 3: Use ultra-fine abrasives to polish and refine the edge.
These stages ensure a razor-sharp edge. Here’s a quick guide:
| Stage | Material | Purpose |
| 1 | Coarse Diamond | Create Edge |
| 2 | Fine Diamond | Hone Edge |
| 3 | Ultra-fine Abrasives | Polish Edge |
Remember to maintain an angle of 20 degrees while sharpening. This ensures the best results. Sharpening kitchen knives at home becomes easy with Chef’s Choice. Regular sharpening keeps your Chef’s Knife in top condition.
Paring Knife
The Paring Knife is a small, precise tool for peeling and detailed tasks. It’s essential for tasks that require control and accuracy. Like the Chef’s Knife, a sharp Paring Knife makes a difference.
Using the Sharpener for your paring knife consists of the same steps:
- Stage 1: Start with coarse diamond abrasives to form the edge.
- Stage 2: Move to fine diamond abrasives to refine the edge.
- Stage 3: Finish with ultra-fine abrasives for a polished edge.
Here’s a quick reference:
| Stage | Material | Purpose |
| 1 | Coarse Diamond | Create Edge |
| 2 | Fine Diamond | Hone Edge |
| 3 | Ultra-fine Abrasives | Polish Edge |
Maintain an angle of 15 degrees for the Paring Knife. This provides the best precision. Sharpening kitchen knives at home saves time and money. With the Chef Knife Sharpener, your Paring Knife will always be ready for any task.
Sharpening Process
Using the Chef Knife Sharpener makes keeping your knives sharp and efficient easy. The sharpening process with this tool is simple, but knowing the steps and common mistakes can help you get the best results. This section will guide you through the sharpening process to ensure your knives stay razor-sharp and ready for culinary tasks.
Step-by-step Instructions
Follow these steps for effective use of the Knife Sharpener:
- Prepare the Sharpener: Place the Sharpener on a stable, flat surface. Ensure the Sharpener is clean and free of debris.
- Choose the Right Slot: The Sharpener typically has multiple slots for different sharpening stages. Identify the correct slot for your Knife’s condition.
- Insert the Knife: Hold the Knife firmly by the handle. Insert the blade into the slot at the base.
- Pull Through Gently: Pull the Knife through the slot with steady pressure. Ensure you maintain a consistent angle as you pull.
- Repeat: For a dull knife, repeat the process 3-4 times. For regular maintenance, 1-2 pulls should suffice.
- Move to Finer Slots: If the Sharpener has multiple stages, move to the finer slots for honing and polishing the blade.
- Clean the Knife: After sharpening, wipe the blade with a damp cloth to remove any metal shavings.
Common Mistakes To Avoid
Sharpening knives can be tricky. Here are some common mistakes to avoid:
- Using Too Much Pressure: Applying excessive force can damage the blade. Use gentle, steady pressure.
- Incorrect Angle: Maintaining the right angle is crucial. Most Chef’s Choice sharpeners guide you, but stay consistent.
- Over-sharpening: Sharpening too frequently can wear down the blade. Sharpen only when necessary.
- Skipping Stages: If your Sharpener has multiple stages, use them all. Skipping stages can leave the blade less sharp.
- Not Cleaning the Blade: Always wipe the blade after sharpening to remove any metal residue. This keeps your food safe and the blade in good condition.
Maintenance Tips
Proper maintenance of your Knife Sharpener ensures long-lasting performance and consistently sharp knives. Understanding how to maintain sharp knives is essential for every home cook. This section will provide detailed maintenance tips, focusing on cleaning and storing the Sharpener.
Cleaning The Sharpener
Regular cleaning is crucial to keep your Knife Sharpener in top condition. Follow these steps to ensure optimal performance:
- Unplug the Sharpener: Always unplug the device before cleaning to ensure safety.
- Remove Metal Debris: Use a small brush or vacuum to remove metal shavings from the sharpening slots.
- Wipe the Exterior: Use a damp cloth to wipe down the Sharpener’s exterior. Avoid using harsh chemicals.
For more thorough cleaning, refer to the following table:
| Component | Cleaning Method |
| Sharpening Slots | Use a brush to remove debris |
| Exterior Surface | Wipe with a damp cloth |
| Power Cord | Check for damage, wipe with a dry cloth |
Regular cleaning maintains the Sharpener and enhances knife maintenance with Chef’s Choice.
Storing Properly
Proper storage of your Knife Sharpener prolongs its life and maintains its functionality. Here are some tips:
- Dry Environment: Store the Sharpener dry to prevent moisture damage.
- Protect from Dust: Keep the Sharpener in a cabinet to avoid dust accumulation.
- Avoid High Temperatures: Store away from heat sources to prevent damage to electrical components.
Consider the following storage options:
| Storage Location | Benefits |
| Kitchen Cabinet | Protected from dust and moisture |
| Drawer | Convenient and safe from heat |
| Countertop (Covered) | Easy access and dust protection |
Troubleshooting Issues
A Chef’s Choice Knife Sharpener can be a game-changer in your kitchen. However, you might need some help using it. Troubleshooting issues can extend the life of both your Knife and Sharpener. This guide will help you fix problems with dull blades and sharpener malfunctions.
Dull Blade Problems
You might still experience a dull blade even with the best knife sharpener. Here are some common reasons and solutions:
- Improper Angle: Ensure you are holding the Knife at the correct angle. The ideal angle is usually 20 degrees.
- Need More Passes: You may need to make more passes through the Sharpener. Typically, 3-4 passes are sufficient.
- Blade Material: Some blades are made from more rigid materials that need more effort to sharpen. Check the manufacturer’s instructions for your specific Knife.
- Dirty Sharpener: Clean the sharpener slots regularly to remove metal shavings. These can dull the blade further.
For a better understanding, here’s a quick reference table:
| Problem | Solution |
| Improper Angle | Hold the Knife at 20 degrees |
| Not Enough Passes | Make 3-4 passes |
| Blade Material | Check manufacturer instructions |
| Dirty Sharpener | Clean sharpener slots |
Sharpener Malfunctions
Sometimes, the Sharpener itself might have issues. Here are some common sharpener malfunctions and how to fix them:
- Power Issues: Check the power source if your Sharpener doesn’t turn on. Make sure it is plugged in and the outlet is functioning.
- Worn Abrasive Discs: The abrasive discs inside the Sharpener can wear out over time. You might need to replace them. Refer to the user manual for replacement instructions.
- Uneven Sharpening: The Sharpener’s guides might need to be if the Knife gets sharpened unevenly aligned. Re-calibrate the guides according to the user manual.
- Noisy Operation: Unusual noises could indicate something stuck inside the Sharpener. Please turn it off and inspect the slots for debris.
Here’s a quick troubleshooting guide:
| Malfunction | Solution |
| Power Issues | Check the power source |
| Worn Abrasive Discs | Replace discs |
| Uneven Sharpening | Re-calibrate guides |
| Noisy Operation | Inspect for debris |
Performance Expectations
Using the Chef’s Choice Knife Sharpener can transform your kitchen experience. This tool ensures your knives are always at their best, making cutting tasks more accessible and precise. In this section, we’ll discuss the performance expectations you can have when using this Sharpener.
Sharpness Levels
The Chef’s Knife Sharpener offers multiple sharpness levels to suit various needs. These levels ensure you can achieve the perfect edge for any cutting task. Here are the primary sharpness levels:
- Coarse Level: This initial stage is for very dull or damaged knives. It removes a significant amount of material to restore a sharp edge.
- Medium Level: This stage refines the edge, making it suitable for regular kitchen tasks. It’s ideal for maintaining the Knife’s sharpness.
- Acceptable Level: This final stage polishes the blade, giving the Knife a razor-sharp edge, perfect for precision cutting.
Using the Sharpener is straightforward. First, select the appropriate sharpness level. Then, run the Knife through the slot at a consistent speed. Repeat this process until you achieve the desired sharpness.
Here’s a quick reference table for the sharpness levels:
| Sharpness Level | Purpose |
| Coarse | For very dull or damaged knives |
| Medium | For regular maintenance |
| Fine | For a razor-sharp edge |
Longevity Of Edges
The Chef’s Choice Knife Sharpener is designed to sharpen your knives and ensure the edges last longer, providing a convenient solution. A well-maintained edge reduces the frequency of sharpening, saving you time and effort. Here are some factors that contribute to the longevity of edges:
- Consistent Angle: The Sharpener maintains a consistent angle during sharpening, which helps preserve the Knife’s edge.
- Quality Materials: The diamond abrasives used in the Sharpener are of high quality. They ensure effective sharpening without excessive wear on the blade.
- Proper Use: Using the Sharpener according to the instructions will maximize edge retention. Avoid excessive pressure while sharpening.
To maintain the longevity of your knife edges, follow these tips:
- Use the appropriate sharpness level for your Knife’s condition.
- Clean your knives regularly to prevent residue buildup.
- Store your knives properly to avoid damage to the edges.
Adhering to these practices can ensure that your knives remain sharp and efficient for longer, making your kitchen tasks more enjoyable and efficient. The Chef’s Knife Sharpener is your reliable companion in the kitchen, enhancing your cooking experience.
Conclusion
Mastering the Chef’s Choice Knife Sharpener is simple and rewarding. Sharp knives enhance cooking efficiency and safety. Follow the steps, and you’ll enjoy precision cutting every time. Regular maintenance ensures longevity and top performance. Start sharpening today and elevate your culinary experience with ease.
Frequently Asked Questions (FAQs)
Start with stage 1 for dull knives, stage 2 for refining, and stage 3 for polishing or serrated edges. For specific guidelines, refer to your sharpener’s manual.
No, Chef's Choice sharpeners are generally designed for steel knives. Using them on ceramic knives can damage both the knife and the sharpener.
Sharpen as needed, typically every few weeks or months, depending on usage. Light touch-ups may be done more frequently to maintain a sharp edge.
Gently pull the knife through each slot, maintaining consistent downward pressure and following the angle guides. Avoid excessive force and ensure a smooth, even stroke.
Unplug the sharpener and wipe it with a damp cloth. Empty any metal filings collected inside. Do not immerse the unit in water.
While it can improve most knives, severely damaged knives may require professional sharpening or repair. The sharpener is best for maintaining existing edges.
A 2-stage sharpens and polishes, while a 3-stage adds a final polishing or serrated edge stage, offering more refinement.
Related Posts
-
 What Is a Slicing Knife Used For? Discover How It Makes Cooking Easy!
 -
 What knives does Gordon Ramsay use? Check out his premium knives
 -
 What Knife Do Navy Seals Use? SEAL's Standard Issue 2025
 -
 What Knife Does John Wick Use? Learn About His Deadly Blade
 -
 What is a Nakiri Knives Used For? Benefits & Features Explained
 -
 Fish Knife vs Butter Knife: Key Differences and Uses Explained
 -
 How to Sharpen Global Knife: A Quick Guide 2025
 -
 Decoding the Iconic Why So Serious Joker Knife
 -
 The Right Way to Use a Steak Knife: Tips and Tricks
 -
 How to Sharpen a Morakniv Knife Safely and Effectively