How to Sharpen a Hawkbill Knife for Long-Lasting Performance
Whether you’re a seasoned professional or a hobbyist, sharpen a hawkbill knife is vital for maintaining its cutting precision and performance. With its distinctive curved, inward blade, the hawkbill knife is designed for specialized tasks like gardening, rope cutting, and detailed crafts.
Sharpening this type of knife can be trickier than a traditional straight-edged blade. Unlike standard knives, the curve requires a unique approach to keep the edge sharp and functional. This guide walks you through the essential tools and techniques for keeping your Hawkbill knife in top condition, ensuring safety, accuracy, and optimal performance.
By understanding how to maintain a sharp edge, you’ll get the most out of your knife, making your tasks easier and more efficient.
What is a Hawkbill Knife?
Definition and Description
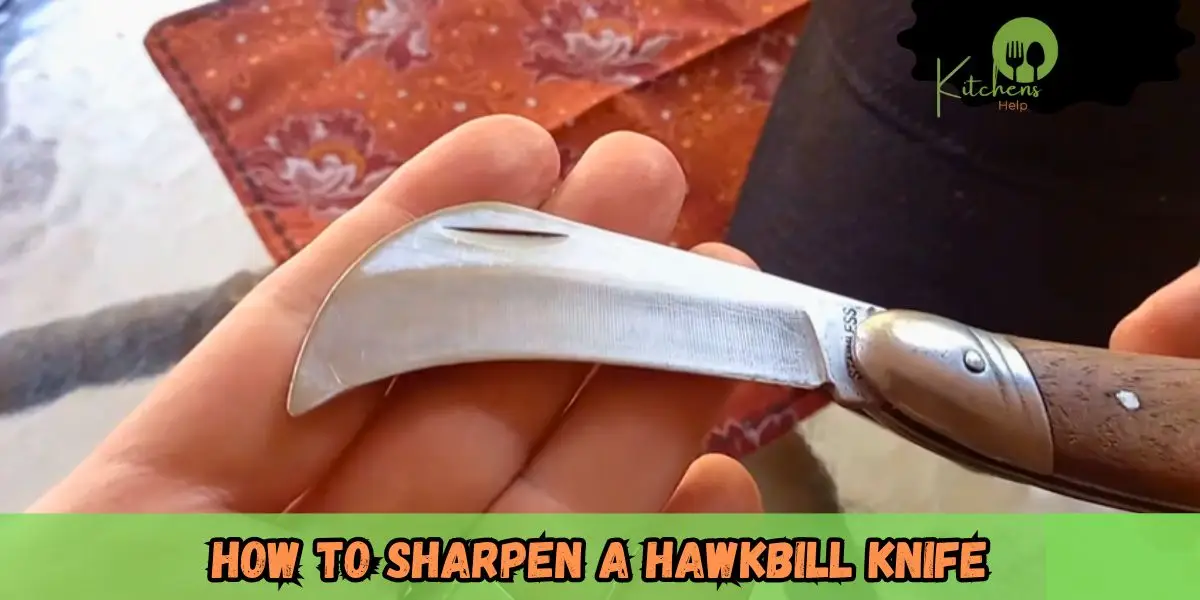
The hawkbill knife is a unique tool known for its curved, inward-facing blade, a marvel of design. Resembling a hawk’s beak, this curve is not just for aesthetics but also for practicality. It makes the knife perfect for cutting through rigid materials precisely, allowing for a smooth, controlled cut, especially in tight spaces.
Common Uses
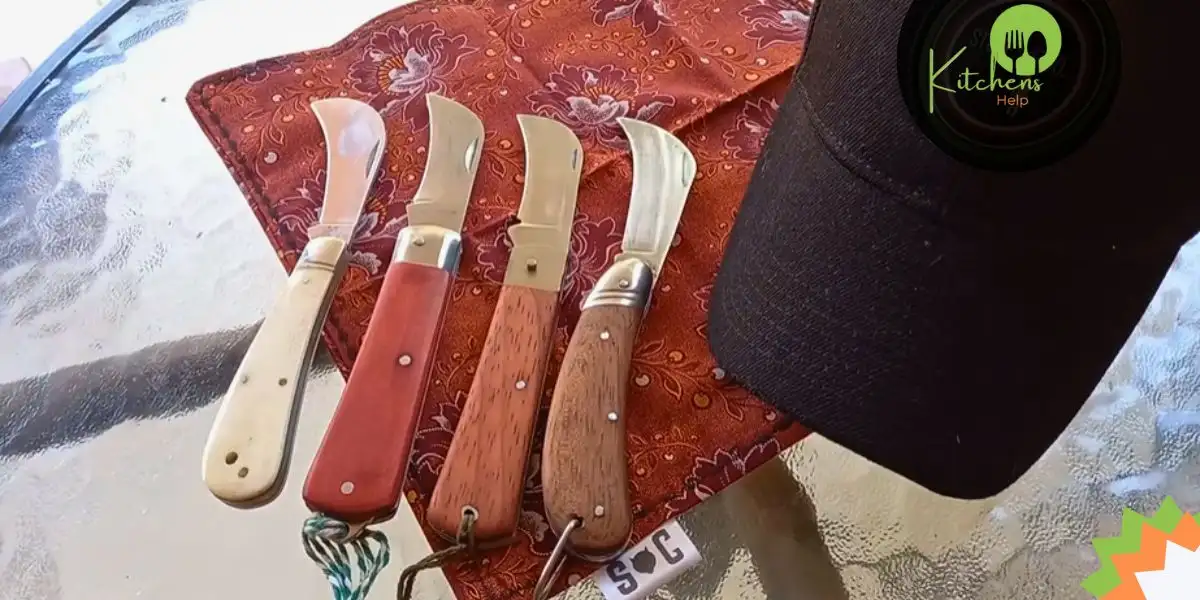
Hawkbill knives are not just for one specific task but are incredibly versatile. You’ll often find them used in gardening for cutting branches, pruning, or harvesting. They are also great for cutting ropes, especially when making quick, clean slices. People who do detailed crafts also love these knives because the curve helps with intricate, detailed cutting. They’re even used in rescue operations and some outdoor tasks. The possibilities are endless!
Why It’s Different
The hawkbill knife presents a unique challenge when it comes to sharpening. Its curved edge is the main difference between a hawkbill knife and a regular knife. Unlike the straight edge of most knives, the hawkbill’s inward curve makes it challenging to sharpen with traditional methods. You can’t just run it along any sharpening stone. The curve needs extra attention to keep the edge sharp and effective. But fear not; we’re here to guide you through this specialized process.
Essential Tools for Sharpening a Hawkbill Knife
To sharpen your hawkbill knife properly, you’ll need the right tools. Using the right equipment will make the job easier and ensure your blade stays sharp longer. Here are the key tools you’ll need:
Sharpening Stone (Whetstone)
A sharpening stone or whetstone is the most common knife tool. You’ll want a medium to fine grit stone for a hawkbill knife. A coarser stone might work for heavy repairs, but a fine grit will help you get a sharper, smoother edge. Make sure to soak your stone in water for about 10-15 minutes before you begin, as this will keep the stone from wearing down too quickly and help create a better edge.
Honing Rod
A honing rod is not the same as a sharpening stone. It’s for maintenance between full sharpenings. After using your Hawkbill knife a few times, run it along the honing rod to realign the edge. This will keep the blade sharp and reduce the need for frequent sharpening.
Knife Sharpening System
A guided knife sharpening system can significantly help beginners. These systems often come with adjustable angles to maintain the correct angle while sharpening, which is especially useful for beginners who struggle with the proper blade angle.
Strops or Polishing Compounds
Once sharpening your knife, you can use strops or polishing compounds to finish the job. A strop is a piece of leather that helps polish the edge and remove any tiny burrs that might be left behind. This extra step ensures a smooth, sharp finish.
Safety Equipment
Always wear protective gloves when sharpening your knife. The tools are sharp, and it’s easy to slip. Gloves can prevent cuts and injuries.
Step-by-Step Guide to Sharpening a Hawkbill Knife
Sharpening a hawkbill knife may seem tricky because of its curved edge. But don’t worry, it’s easier than you think! Follow these simple steps, and you’ll quickly have a sharp, effective blade.
Prepare Your Sharpening Surface
Before you start, make sure your sharpening stone is ready. If you’re using a whetstone, soak it in water for 10-15 minutes. This helps the stonework better and prevents the blade from getting too hot during sharpening. Place the stone on a non-slip surface, such as a damp towel, to keep it steady while you work.
Understand the Blade Angle
The next important step is setting the correct sharpening angle. This angle is usually between 25 and 30 degrees for a hawkbill knife. You need to maintain this angle as you sharpen the edge. A sharpening guide can help if you’re unsure how to hold the blade at the right angle. This will prevent damage to the edge and ensure the blade is sharp.
Sharpening the Blade Edge
Now, it’s time to sharpen the blade. Start by holding the knife at the correct angle. Gently run the blade along the sharpening stone, moving from the tip to the knife’s heel. For hawkbill knives, the most challenging part is sharpening the inside curve. You might need to adjust the angle to follow the curve properly. Keep your strokes even and consistent. Avoid applying too much pressure—let the stone do the work.
As you sharpen, you should see tiny metal shavings (called a burr) forming on the opposite side of the blade. This is normal. It means you’re getting the edge sharp.
Finishing the Blade
Once you’ve sharpened both sides of the blade, it’s time to hone the edge. Use a honing rod to lightly run the blade along its surface. This helps straighten any edges that may have become slightly bent. Finish by using a strop or polishing compound to remove any remaining burrs. This will leave your blade with a smooth, sharp finish.
Testing the Sharpness
Now that your blade is sharpened, it’s time to test it. Try cutting through a piece of paper—a sharp blade will slice through it quickly. You can also test by gently running the blade against a small patch of hair. If the blade shaves easily, it’s sharp and ready to use.
Tips for Maintaining Your Hawkbill Knife
Once your hawkbill knife is sharpened, keeping it in good condition is essential. Regular care will ensure it stays sharp and ready for use. Here are some valuable tips to help you maintain your knife:
Regular Honing
Even if your knife is sharp, it’s essential to hone the edge regularly. Use a honing rod to straighten the blade after each use gently. Honing doesn’t remove metal but helps maintain sharpness by realigning the edge. Doing this once every few uses will keep your knife working well for longer.
Proper Storage
Proper storage of your hawkbill knife is crucial for its longevity. Please keep it in a protective sheath to prevent the blade from dulling or getting damaged. Avoid leaving it exposed to moisture or dirt, which can cause rust. Store it in a dry, cool place. A wooden block or magnetic strip is a great way to keep your knife safe and in good shape.
Avoiding Common Mistakes
While sharpening and maintaining your hawkbill knife, be mindful of a few common mistakes. Using the wrong angle can damage the blade, so always stick to the recommended 25-30 degrees. Also, over-sharpening can prematurely wear down the blade. Hone frequently and sharpen only when necessary.
How Often Should You Sharpen Your Hawkbill Knife?
Knowing how often to sharpen your hawkbill knife is essential for keeping it in top condition. You don’t need to sharpen it after every use, but you should monitor its performance. Here’s what you need to know:
Factors That Affect Sharpening Frequency
The need to sharpen your knife depends on how often you use it and what you cut. A hawkbill knife used for heavy tasks like cutting thick rope or pruning branches will need sharpening more often. On the other hand, a knife used for light tasks like trimming fabric will not dull as quickly.
Your knife’s storage conditions also affect its performance. If you store it in a damp environment, it may rust, which could cause the edge to dull faster. Keeping your knife in a dry, clean place will help it stay sharp for longer.
Signs Your Knife Needs Sharpening
You don’t always need to wait until the knife is entirely dull. Some signs to look for include:
- Difficulty cutting through materials that were once easy to slice.
- The knife feels draggy or uneven when cutting.
- The edge doesn’t “bite” into the material as sharply as before.
If you notice these signs, it’s time to sharpen your knife.
By paying attention to how your knife feels during use and how often it is exposed to rigid materials, you’ll know exactly when it needs sharpening.
Common Mistakes to Avoid When Sharpening a Hawkbill Knife
Sharpening a hawkbill knife can be easy, but avoiding common mistakes is essential. These mistakes can damage your knife or make the sharpening process less effective. Here’s what to watch out for:
Over-Sharpening the Blade
One common mistake is over-sharpening. While it’s tempting to keep sharpening, doing so too often can wear down the blade and shorten its lifespan. You only need to sharpen your knife when the edge feels dull or doesn’t cut as well as it used to. Regular honing should be enough in between sharpenings.
Incorrect Sharpening Angle
Another mistake is using the wrong sharpening angle. Hawkbill knives typically need an angle of 25-30 degrees. If you sharpen at too steep or too shallow an angle, you can damage the blade, and it won’t stay sharp for long. If you’re unsure about the angle, use a sharpening guide.
Using the Wrong Tools
Not all sharpening tools are suitable for hawkbill knives. For example, a cheap, low-quality sharpener might not give you a good edge. Investing in a whetstone or knife sharpening system specifically designed for curved blades is better. These tools will make the job easier and more effective.
Conclusion
Sharpening a hawkbill knife might seem straightforward, but it’s an art that requires both patience and an understanding of the tool’s unique design. While most knives feature a straight edge, the hawkbill’s curved blade demands a more nuanced approach. The key lies in maintaining the integrity of the curve, using sharpening stones or rods with a consistent angle to ensure a sharp, functional edge. It’s also essential to remember that the hawkbill is built for precision cutting—often in tight or contoured spaces. By sharpening with intention, you enhance the knife’s performance and respect its specialized purpose.
In a world where tools are often treated as disposable, sharpening a hawkbill knife reminds us of the value of maintenance and longevity. A well-kept blade is not just about cutting—it’s about preserving the craftsmanship behind the design. So, next time you sharpen, think beyond sharpness—think about the legacy of a tool well cared for.
Frequently Asked Questions (FAQs)
The curved blade of a hawkbill knife knife is ideal for precision cutting, carving, or detailed work. Its unique shape requires careful sharpening to maintain its edge.
Sharpening stones, ceramic rods, or specialized curved honing tools are ideal. A diamond sharpening stone can also be used for efficient, durable sharpening.
Use a round sharpening rod or a stone with a narrow profile to match the curve. Work slowly and consistently to preserve the hawkbill’s distinctive shape.
Sharpen your hawkbill knife whenever the edge dulls, usually after significant use. Frequent light touch-ups can maintain the performance of major sharpenings
Aim for a sharpening angle of 20 to 30 degrees. Maintaining this angle is crucial to preserving the blade's functionality and preventing wear on the edge.
Yes, but you’ll need to adapt. Use a narrow or round stone and carefully follow the blade's curve to maintain its sharpness and shape.
Gently test the blade on a piece of paper or a soft material. A sharp hawkbill should slice cleanly without resistance, indicating a practical edge.
Related Posts
-
 23 Feb 2025 KnifeWhat Is a Slicing Knife Used For? Discover How It Makes Cooking Easy!
 -
16 Feb 2025 KnifeWhat knives does Gordon Ramsay use? Check out his premium knives
-
15 Feb 2025 KnifeWhat Knife Do Navy Seals Use? SEAL's Standard Issue 2025
-
08 Feb 2025 KnifeWhat Knife Does John Wick Use? Learn About His Deadly Blade
-
30 Jan 2025 KnifeWhat is a Nakiri Knives Used For? Benefits & Features Explained
-
12 Jan 2025 KnifeFish Knife vs Butter Knife: Key Differences and Uses Explained
-
11 Jan 2025 KnifeHow to Sharpen Global Knife: A Quick Guide 2025
-
10 Jan 2025 KnifeDecoding the Iconic Why So Serious Joker Knife
-
09 Jan 2025 KnifeThe Right Way to Use a Steak Knife: Tips and Tricks
-
08 Jan 2025 KnifeHow to Sharpen a Morakniv Knife Safely and Effectively