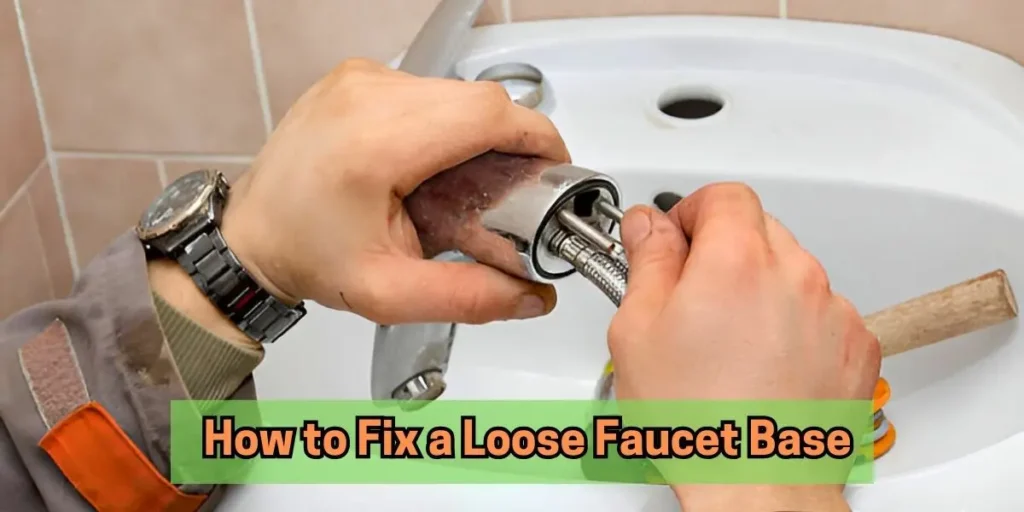
How to Fix a Loose Faucet Base: Quick and Effective Solutions
Is your faucet wobbling or making an annoying noise? A loose faucet base can be frustrating, but the good news is you can quickly fix it yourself. Learning how to fix a loose faucet base is essential for every homeowner.
By tightening the mounting nut and checking for other loose components like the faucet handle or spout, you can restore your faucet’s stability and avoid costly plumber visits.
Faucet repair is simpler than you think. With a few essential tools, such as wrenches and pliers, and some know-how, you can quickly tighten the faucet mounting nut and secure the faucet base. This DIY faucet repair guide will walk you through each step, whether fixing a kitchen faucet, replacing the spout, or applying a plumber’s tape for extra security.
Taking care of faucet installation issues early can prevent more serious problems later, such as water valve shut-offs or leaks. Let’s explore how to fix a loose faucet base and make your sink work like new again!
Understanding the Common Causes of a Loose Faucet Base
The Impact of Frequent Use
Your faucet’s base can slowly become loose due to daily use. When you turn the handle multiple times daily, the constant movement stresses the components, which can cause the base to loosen.
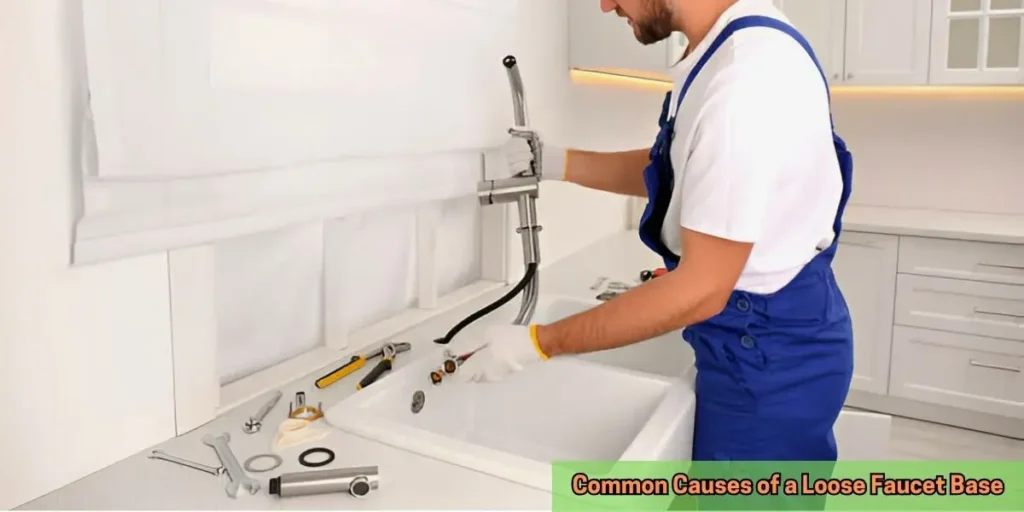
Why Mounting Nuts and Bolts Wear Out
Mounting nuts and bolts are crucial to securing your faucet. These parts can loosen due to regular use. Over time, they may wear out or become weak, making it harder to keep the faucet tight. If not appropriately tightened during installation, they can also loosen more quickly.
Effects of Mineral Buildup or Corrosion
If you live in an area with hard water, mineral buildup can cause serious issues. Calcium and lime deposits collect in the faucet, affecting the function and stability of the components. This corrosion can weaken the mounting nut, making the faucet prone to wobbling and leaks.
In such cases, you may need a faucet repair to fix the loose faucet base. Tightening the faucet mounting nut is essential, and consider repairing or replacing the faucet handle or spout if necessary. Regular cleaning can help prevent these problems and keep your faucet in good order.
Tools You’ll Need to Fix a Loose Faucet Base
When fixing a loose faucet base, having the right tools is key to a successful repair. Let’s break it down:
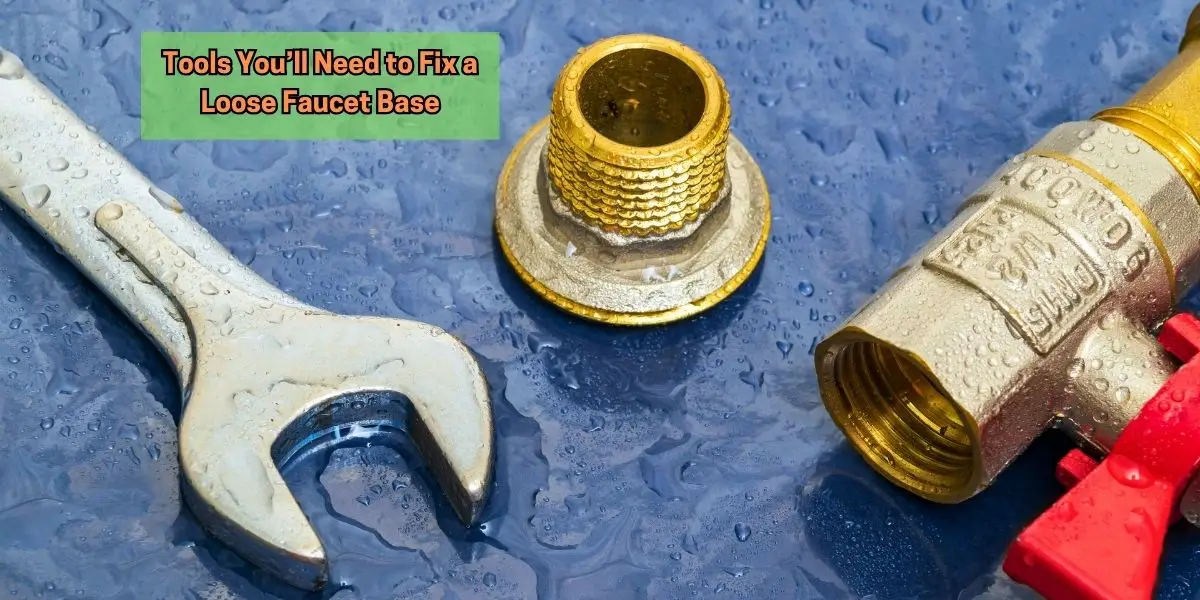
Wrenches and Pliers
Wrenches and pliers are essential tools for tightening or loosening the mounting nut. It is crucial to choose the right size, as using the wrong size can damage the tool. Adjust your wrench to fit snugly around the nut for a secure tightening.
Rubber Gaskets and Seals
Rubber gaskets and seals are essential for leak-proof fixes. These small but powerful parts ensure your faucet remains sealed, preventing leaks. Over time, gaskets can wear out, causing water to drip. Always check the seals and replace them when necessary.
Cleaning Tools
Mineral buildup can make tightening difficult. Hard water deposits often clog faucet parts. Clean the faucet base with a soft brush and vinegar solution to avoid this. This will remove any debris or mineral buildup interfering with a secure fit.
Bonus Tip
If your faucet is still leaking after tightening, consider using a plumber’s tape for faucets. This simple DIY faucet repair can seal any gaps and prevent further leakage. If you have faucet installation issues, this tape can also help during the setup. Remember, permanently shut off the water valve before starting your repair!
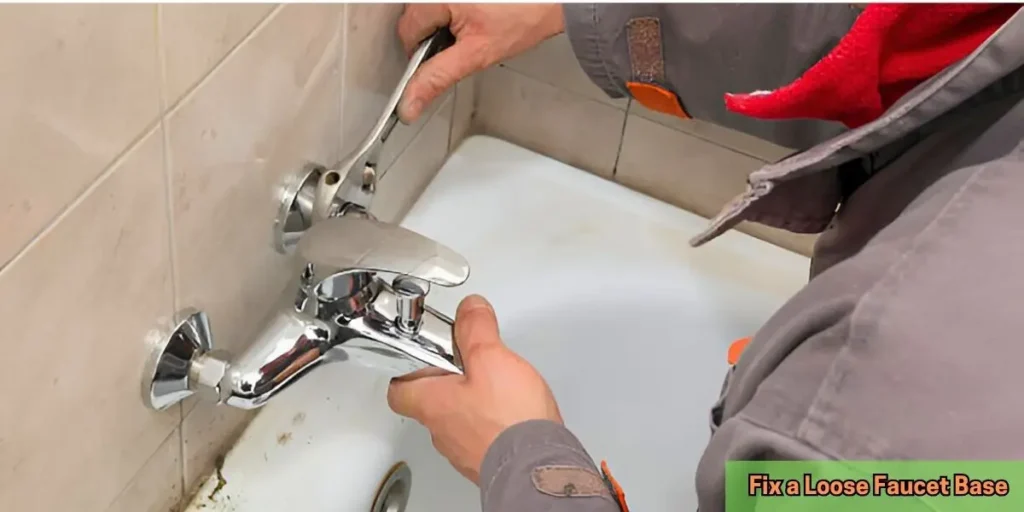
Step-by-Step Guide to Fix a Loose Faucet Base
Fixing a loose faucet base can be a simple DIY task. If you’ve noticed your faucet is wobbling or leaking, don’t worry. You can return it to perfect condition with just a few steps and some essential tools.
Step 1: Clear the Area for Easy Access
Before you begin, make sure the area under the sink is clear. Remove any cleaning supplies, pots, or other items. This will give you enough room to work without obstacles. Use an IUsea flashlight to improve your visibility. If the space is too dark, use a flashlight to help you see the faucet’s base and mounting nut, making the job easier.
Step 2: Turn Off the Water Supply
The first thing you need to do is turn off the water supply. Locate the water valve under the sink and turn it clockwise to stop the water flow. This step is crucial to avoid spills while you’re working. After shutting off the water, test the faucet by turning it on to ensure the flow has stopped. It’s always a good idea to double-check this to prevent water from running when you remove parts.
Step 3: Inspect the Faucet Base and Mounting Nut
Next, check the faucet base and the mounting nut. The mounting nut is usually found beneath the sink. If the nut is loose, you may need to tighten it. However, it’s essential to address other issues, such as corrosion or worn-out washers, which could be the reason your faucet is loose in the first place.
Step 4: Tighten the Mounting Nut
Once you’ve inspected the nut, it’s time to tighten it. Use an adjustable wrench or pipe wrench to turn the nut. Be careful not to overtighten it, as overtightening can damage the faucet base, leading to more serious problems like leaks. A gentle turn should be enough to secure the base. If the nut is too worn out, it might need to be replaced. This is a simple fix that will make your faucet more stable.
Step 5: Check for Stability
After tightening the mounting nut, check the faucet for stability. Gently shake the faucet to see if it wobbles. If it does, you may need to tighten the nut further or inspect the washers. A wobbling faucet could also mean the base is cracked or the O-ring needs replacing. If the faucet is stable, you’ve completed the fix.
Additional Fixes for Loose Faucet Components
Tightening the Faucet Handle
When your faucet handle becomes loose, it can cause frustration. Don’t worry; it’s usually a quick fix. The first step is to locate the set screw, which is often hidden behind a decorative cap. Use a small screwdriver to remove the cap, revealing the screw. Once you see it, use an appropriate tool to tighten it. Depending on your faucet model, this can be done with a simple wrench or screwdriver. Tightening the screw will prevent any unnecessary wobbling.
Related to: How to Fix a Leaking Sink Drain
How to Fix a Loose Faucet Spout
If your faucet spout is loose, it can make your kitchen sink faucet unstable. The first thing you’ll need to do is safely remove the spout. You might need to twist or pull it off, but be gentle to avoid damaging parts. Once the spout is removed, check for mineral buildup or corrosion, which can affect its performance. If necessary, clean the area using a brush and some vinegar. Reattach the spout and ensure it’s tightly secured. A wobbly spout can be fixed by replacing worn-out washers or tightening the faucet base mounting.
Replacing O-rings
O-rings are essential for preventing leaks and ensuring the faucet stays stable. These rubber seals can wear out over time, causing leaks or a loose faucet. To replace an O-ring, remove the faucet handle and locate the O-ring. You may need to unscrew a nut to access it. Once removed, clean the area and place the new O-ring in the correct position. Reassemble the faucet and check for leaks. This simple step can save you from the hassle of constantly repairing a leaking faucet.
Repairing a Loose Spray Nozzle
If your faucet has a pull-out spray nozzle, it might become loose over time. This is usually due to wear and tear. To fix this, you’ll need to re-secure the nozzle. First, carefully detach the spray nozzle. Check the connection and the hose for any signs of damage or leaks. If everything seems fine, tighten the nozzle back into place. You can also apply plumber’s tape to faucets to prevent future leaks. This step ensures that your spray nozzle works appropriately and stays secure.
Common Issues That Can Affect Faucet Stability
Faucets are essential in every kitchen but can face several issues over time. These problems may make your faucet loose or cause it to function poorly. Let’s explore some of the most common issues and how you can solve them.
Worn-Out Mounting Hardware
Over time, the nuts and bolts that hold your faucet in place can wear out, causing the faucet to become loose or wobbly. If you notice your faucet shifting, it may be time to check the mounting hardware. Tighten any loose nuts with a wrench. If they are too damaged, replace them with new ones to ensure a stable faucet.
Mineral Buildup and Corrosion
Hard water often leaves behind mineral deposits, which can build up on the faucet components. These deposits can make it harder to tighten the faucet base, and they may cause corrosion over time. To clean your faucet and prevent these issues, use a descaling solution. A mixture of vinegar or citric acid can help break down the minerals. Soak a cloth in the solution and wrap it around the affected areas for 15-20 minutes before scrubbing.
Descaling the Faucet
Descaling is an essential part of faucet maintenance. It removes mineral deposits that affect water flow and faucet function. Pour vinegar or citric acid into a bowl and scrub the affected areas with a soft cloth. Rinse thoroughly afterward to avoid any lingering acid, which could damage the faucet.
Loose or Broken Seals
Another common problem is faulty seals. Seals prevent leaks and maintain the integrity of the faucet. If the seals are loose or broken, they can lead to water leaks, making the faucet unstable. Replacing the seals is easy and can be done by unscrewing the faucet handle and replacing the old O-rings with new ones. This will prevent water from seeping out and help maintain the stability of your faucet.
Preventive Maintenance to Avoid Future Loosening
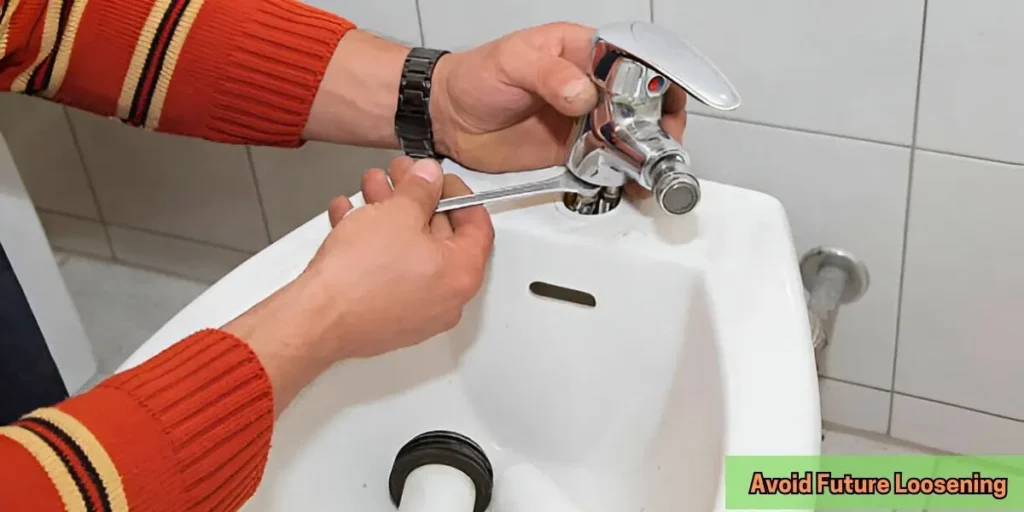
Regular preventive maintenance makes keeping your faucet tight and secure easy. By following a few simple steps, you can prevent future loosening and extend the life of your faucet.
Regular Inspections
Check your faucet for signs of loosening every few months. Pay attention to the base and handle. If you notice movement or wobbling, tighten the components. Regular inspections can prevent unexpected leaks and more serious damage.
Clean and Lubricate Components
Dirt, grime, and mineral buildup can cause parts to wear out faster. To prevent this, clean the faucet regularly. Use a soft cloth and mild cleaner. Make sure to wipe around the base and handle. Lubricating the moving parts with a silicone-based lubricant can reduce friction and keep everything working smoothly. This will help reduce wear and keep the faucet in top condition.
Use of Plumber’s Tape or Silicone Sealant
Consider using plumber’s tape or silicone sealant to prevent future loosening. Plumber’s tape can be wrapped around the threads of the faucet’s mounting nut, providing extra grip and preventing water leaks. Silicone sealant, on the other hand, can be applied to areas that may develop small gaps. Both materials help secure the parts and prevent loosening over time.
These simple maintenance steps will keep your faucet secure and prevent potential problems. Regular care is the key to avoiding future issues.
Related to: How to Insulate Under Kitchen Sink
How To Snake A Kitchen Sink Drain Roots
Why Does My Bathroom Sink Smell Like Sewer?
When to Call a Professional Plumber
Sometimes, fixing a loose faucet or other plumbing issues at home can be simple. However, there are times when it’s best to call a professional plumber.
Signs It’s Time to Call an Expert
If you notice significant leaks that won’t stop or water damage around your sink, it’s time to get help. Leaks can cause severe damage to your home and should not be ignored. Severe corrosion, like rust on pipes, is another red flag. Corroded parts can break easily, causing more problems. You’ll need a plumber if any parts of your faucet are cracked or damaged beyond repair. Sometimes, the problem is too big or too complex for DIY fixes.
Choosing a Plumber
When it’s time to call a plumber, you want to find someone reliable. Start by checking online reviews. Positive feedback from other customers can help you choose the right expert. Ask for estimates upfront. A good plumber will give you a clear idea of the cost. Look for a plumber who is licensed and insured. This ensures they are qualified and covered if anything goes wrong. Finally, make sure their rates are reasonable and within your budget.
If the issue is severe, don’t wait too long. Calling a professional plumber early can save you time and money in the long run!
Conclusion
Fixing a loose faucet base is easy; anyone can do it with the right tools and patience. First, ensure you have the right tools, such as a wrench, pliers, and rubber gaskets. These will help you tighten the faucet securely without causing damage.
Start by clearing the area under your sink and turning off the water supply. Then, check the faucet base and the mounting nut for signs of wear or damage. Tighten the mounting nut carefully, being careful not to overdo it. Afterward, test the faucet to ensure it’s stable and doesn’t wobble.
If other parts, like the handle or spout, are loose, follow similar steps to tighten them. Regular maintenance, like checking for mineral buildup or worn seals, can prevent future issues. If you’re unsure or face more significant problems, don’t hesitate to call a plumber.
By following these steps, you can keep your faucet in excellent condition for a long time.
FAQs About Fixing a Loose Faucet Base
If you can't turn off the water, try using pliers on the valve for extra grip. If that doesn’t work, turn off the main water supply for the house. Consider replacing old valves if needed.
Faucets can loosen due to worn-out mounting hardware, mineral buildup, or improper installation. To fix this, properly tighten all parts and replace damaged components.
The plumber’s tape helps seal leaks but doesn’t tighten loose parts. Use it around threaded connections, but tighten it with a wrench for loose mounting nuts.
Check your faucet every 3-6 months. Look for any movement or wobbling, and tighten parts if needed.
Inspect the base for visible cracks or chips. If you see any damage, replace the faucet base to avoid leaks and instability.
Related Posts
-
 03 Jan 2025 SinkLearn How to Remove Garbage Disposal From Sink 2025
 -
 03 Jan 2025 SinkHow to Install a Kitchen Sink Sprayer in Simple Steps 2025
 -
 30 Dec 2024 RemodelSimple & Effective: Basement Bathroom Plumbing Diagram
 -
 30 Dec 2024 SinkHow Far from Sink Can Dishwasher Be? Key Facts Explained
 -
 29 Dec 2024 SinkHow to Get Instant Hot Water at Kitchen Sink
 -
 28 Dec 2024 SinkHow to Fix an Airlock in a Kitchen Sink Drain: A Step-by-Step Guide
 -
 27 Dec 2024 SinkKitchen Sink Soap Dispenser Not Working? Here’s How to Fix It
 -
 26 Dec 2024 SinkKitchen Sink Drains into Yard: Causes, Solutions
 -
 26 Dec 2024 SinkNo Water in Bathroom but Everywhere Else: Expert's Solutions
 -
 26 Dec 2024 SinkDouble Kitchen Sink Plumbing Diagram: A Visual Guide